

Welcome to the world of MrCool DIY Mini Splits! If you're considering a cost-effective, energy-efficient heating and cooling solution for your home, you've come to the right place. This guide is designed for beginners, walking you through the basics of what MrCool DIY Mini Splits are, their benefits, and how they work.
Understanding MrCool DIY Mini Splits
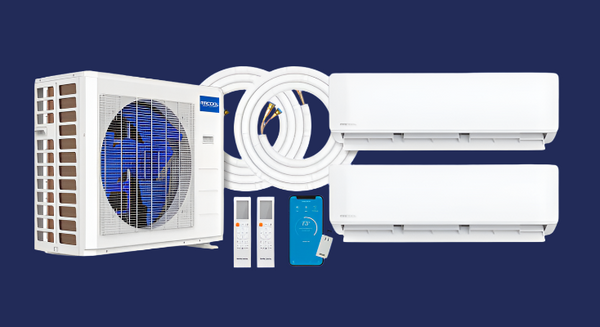
MrCool DIY Mini Splits are a type of ductless heating and cooling system. Unlike traditional HVAC systems, they don't require extensive ductwork, making them a great option for older homes or additions where installing ducts is impractical or too costly. The system consists of two main components: an outdoor compressor/condenser and one or more indoor air-handling units.
Key Features:
- DIY Installation: Designed with the average homeowner in mind, these units can be installed without professional help, thanks to their simple setup and pre-charged refrigerant lines.
- Energy Efficiency: They are known for their energy efficiency, which can lead to significant savings on utility bills.
- Zoned Comfort: With the ability to control temperatures in individual rooms, they offer personalized comfort.
Benefits of MrCool DIY Mini Splits
Easy Installation
The DIY aspect of these systems is a major selling point. You don't need specialized tools or advanced HVAC knowledge. The included installation kit and instructions make it manageable for most homeowners.
Cost-Effective
By eliminating the need for professional installation and being energy-efficient, MrCool DIY Mini Splits can be a more affordable option in the long run compared to traditional HVAC systems.
Versatility
Whether you're looking to heat and cool a single room, a garage, a home addition, or even multiple rooms, there's a MrCool DIY Mini Split to fit your needs.
Improved Air Quality
With advanced filtration systems, these units can reduce dust, allergens, and other particulates, leading to better indoor air quality.
How They Work
The process is straightforward:
- Heat Exchange: The outdoor unit compresses refrigerant, which is then circulated to the indoor units.
- Indoor Cooling/Heating: Inside your home, the air-handling units blow indoor air over their evaporator coils, cooling or heating the air before recirculating it back into the room.
- Control and Operation: You can control the system using a remote, thermostat, or even a smartphone app, allowing for easy adjustments.
Installation Basics
Tools and Materials
Most of what you need comes in the installation kit. However, you might need some basic tools like a drill, level, and screwdriver.
Steps Involved
- Mount the Indoor Unit: Choose a spot on your wall and secure the mounting bracket.
- Drill a Hole for Connections: This is for the refrigerant line, power cable, and condensate drain to connect to the outdoor unit.
- Install the Outdoor Unit: It should be placed on a flat, stable surface.
- Connect the Units: Follow the instructions to connect the refrigerant lines, power, and condensate drain.
- Start-up: Once everything is connected and double-checked, power up the system.
Conclusion
MrCool DIY Mini Splits are an innovative solution for homeowners looking to take control of their indoor climate without the need for professional installation. With energy efficiency, cost-effectiveness, and ease of installation, they represent a smart choice for modern home climate control.
Remember, while DIY is a key aspect of these systems, always consult the manual and follow safety guidelines. When in doubt, don't hesitate to seek advice from a professional. Happy cooling (and heating)!