Installation Steps for the MRCOOL DIY 12k BTU Heat Pump
The MRCOOL DIY 12k BTU Heat Pump system is designed for DIY installation, featuring quick connect fittings that eliminate the need for specialized tools like vacuum pumps and gauges, making it ideal for homeowners. Follow these steps to install your system quickly and efficiently.
What You'll Need
- Drill and drill bits
- Level
- Hole saw kit
- Phillips and flathead screwdrivers
- Adjustable wrenches (x2)
- Tape measure
- Stepladder
Preparation
-
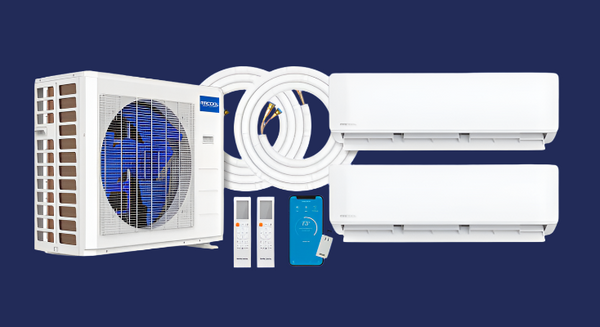
Check Package Contents: Ensure that all components are included: the indoor unit, outdoor unit, remote control, communication cable, power cable, pre-charged copper tubing with quick connect fittings, wall sleeve, and mounting plate.
-
Select Installation Locations:
- Indoor Unit: Mount about 7-8 feet above the floor, on a sturdy interior wall, avoiding direct sunlight and heat sources.
- Outdoor Unit: Place on a flat, stable surface away from direct sunlight and water pooling. You can use a concrete pad or mount it on a wall bracket.
Installation Process
Indoor Unit Installation
-
Mount the Installation Plate:
- Use a level to ensure horizontal alignment. Mark drilling spots, drill the holes, insert wall anchors, and attach the plate securely.
-
Drill a Hole for the Piping:
- Drill a 3.5-inch hole through the wall for the piping and cables, aligning it with the marked spot on the mounting plate.
-
Install the Indoor Unit:
- Feed the copper tubing, power cables, and communication cable through the hole.
- Hang the indoor unit on the installation plate, ensuring it’s securely mounted.
Outdoor Unit Installation
-
Prepare the Location:
- If placing the unit on the ground, ensure it’s on a stable, level surface. Use a concrete pad or anti-vibration pads if necessary.
- If mounting on a wall, use a bracket that is securely fastened and level.
-
Install the Outdoor Unit:
- Place the outdoor unit on the pad or mount it on the wall bracket.
Connecting the Indoor and Outdoor Units
-
Connect the Copper Pipes with Quick Connect Fittings:
- Carefully align and connect the pre-charged copper pipes from the indoor unit to the outdoor unit. Start threading by hand to avoid cross-threading and finish tightening with adjustable wrenches. Do not over-tighten.
-
Connect Electrical and Communication Wiring:
- Connect the communication cable and power cable between the indoor and outdoor units, ensuring proper alignment of the wire colors and numbers for a secure connection.
-
Secure the Pipes and Cables:
- Use optional line set covers to protect the copper pipes and cables from environmental damage. Secure the line set to the wall.
System Start-Up
-
Final Inspection and Leak Check:
- Check all connections to ensure they are tight and properly aligned. Visually inspect for leaks at the quick connect fittings.
-
Power Up the Unit:
- Turn on the circuit breaker to power up the system. Use the remote control to activate the indoor unit and select the desired cooling or heating settings.
-
Test the Unit:
- Ensure that the system starts up correctly and begins cooling or heating. Listen for unusual noises and check the display for any error codes.
This guide simplifies the installation process for the MRCOOL DIY 12k BTU Heat Pump, leveraging its quick connect fittings and pre-charged refrigerant lines to make installation accessible for homeowners without needing professional HVAC tools.
For more information, or if you need assistance, feel free to contact us at MRCOOL DIY Direct.