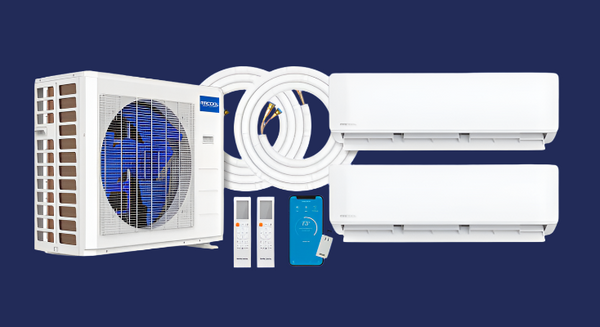

The Ultimate DIY Guide to Installing a MRCOOL Mini Split System
Installing a MRCOOL Mini Split System is a cost-effective and energy-efficient way to improve the heating and cooling of your home. Designed for DIY installation, MRCOOL Mini Splits offer a ductless, efficient, and versatile solution for various spaces, including bedrooms, offices, garages, and additions.
This step-by-step guide will walk you through the planning, installation, and testing phases of installing your MRCOOL Mini Split, ensuring a smooth, safe, and successful setup.
🔹 Step 1: Planning & Preparation
✅ Choosing the Right MRCOOL Mini Split Model
Before purchasing your MRCOOL Mini Split, make sure to select the correct BTU rating for your space. The BTU (British Thermal Unit) rating determines the unit’s cooling and heating capacity.
✔️ Small Rooms (150-350 sq. ft.) → 9,000-12,000 BTU
✔️ Medium Rooms (350-600 sq. ft.) → 18,000 BTU
✔️ Large Rooms (600-1,000 sq. ft.) → 24,000 BTU
✔️ Extra-Large Spaces (1,000+ sq. ft.) → 36,000 BTU+
💡 Tip: A unit that’s too small will struggle to maintain temperature, while an oversized unit will cycle on and off too frequently, reducing efficiency.
✅ Tools & Materials Needed
Before you begin, gather the necessary tools and supplies:
✔️ Drill & Drill Bits (for wall installation)
✔️ Level (to ensure the unit is mounted correctly)
✔️ Screwdrivers (Phillips & flathead)
✔️ Tape Measure
✔️ Crescent Wrenches (2x) (for refrigerant line connections)
✔️ Allen Wrench (for opening refrigerant valves)
✔️ Wall Anchors & Screws
✔️ Electrical Supplies (according to model requirements)
💡 Tip: Ensure you have the correct wire gauge and disconnect box based on your unit’s specifications.
✅ Check Local Codes & Regulations
✔️ Electrical Permits – Some areas require a permit for electrical work.
✔️ Building Codes – Check if there are regulations regarding HVAC installation.
✔️ Professional Assistance – While MRCOOL Mini Splits are DIY-friendly, certain electrical wiring steps may require a licensed electrician.
💡 Tip: Failure to comply with codes can result in safety risks or issues with future home inspections.
🔹 Step 2: Installation Process
📌 Indoor Unit Installation
✅ Step 1: Choose the Right Wall Location
✔️ Avoid direct sunlight & heat sources (e.g., ovens, heaters).
✔️ Ensure proper airflow clearance – at least 6 inches from the ceiling and 12 inches from side walls.
✔️ Select a location near the outdoor unit for easy refrigerant line routing.
💡 Tip: The unit should be centrally placed in the room for optimal airflow and even temperature distribution.
✅ Step 2: Mount the Indoor Unit
✔️ Use the included template to mark the mounting bracket holes.
✔️ Drill holes and secure the bracket using anchors and screws.
✔️ Ensure the bracket is level to prevent drainage issues.
✅ Step 3: Prepare the Refrigerant Line Hole
✔️ Drill a hole (2-3 inches wide) through the wall for the refrigerant lines, electrical wiring, and drainage hose.
✔️ Ensure the hole slopes slightly downward toward the outside to prevent water buildup inside.
💡 Tip: If drilling through brick or concrete, use a masonry drill bit.
✅ Step 4: Mount the Indoor Unit
✔️ Feed the refrigerant lines, electrical cable, and drain hose through the drilled hole.
✔️ Securely hang the indoor unit onto the wall bracket.
✔️ Ensure it snaps into place and is level.
📌 Outdoor Unit Installation
✅ Step 1: Select a Stable Location
✔️ Place on a concrete pad or mount on wall brackets for stability.
✔️ Keep at least 12-24 inches of clearance around the unit for proper airflow.
✔️ Avoid direct obstructions (bushes, walls, fences) that could block air circulation.
✅ Step 2: Connect the Refrigerant Lines
✔️ Carefully uncoil the pre-charged refrigerant lines (avoid kinking!).
✔️ Attach the pre-flared connectors from the indoor unit to the outdoor unit.
✔️ Tighten with two crescent wrenches—one holds the fitting in place while the other tightens.
💡 Tip: Do not overtighten, as this can damage the connection.
✅ Step 3: Open the Refrigerant Valves
✔️ Using the included Allen wrench, slowly open the high-pressure and low-pressure valves.
✔️ Listen for the hissing sound as refrigerant flows through the lines.
💡 Tip: Since MRCOOL systems come pre-charged, there is no need for vacuuming—a major advantage for DIY installers!
✅ Step 4: Make Electrical Connections
✔️ Connect the indoor unit to the outdoor unit using the provided wiring.
✔️ Follow the MRCOOL wiring diagram to ensure proper connections.
✔️ Run power from the outdoor unit to the electrical disconnect box.
💡 Safety Tip: If unsure about electrical work, hire a licensed electrician to ensure compliance with local codes.
🔹 Step 3: Testing & Final Setup
📌 Checking for Leaks
✔️ Use a spray bottle with soapy water to check refrigerant connections for bubbles (indicating a leak).
✔️ If leaks are detected, tighten connections and re-test.
📌 Powering Up & System Testing
✔️ Restore power at the electrical panel.
✔️ Turn on the MRCOOL Mini Split using the remote.
✔️ Test both heating and cooling modes to ensure proper operation.
✔️ Check fan speeds, temperature adjustments, and air distribution.
📌 Remote Control & Smart Home Integration
✔️ Set your desired temperature & fan speed using the remote.
✔️ Connect the unit to Wi-Fi using the MRCOOL SmartHVAC app for smart home control.
✔️ Integrate with Google Home or Alexa for voice-controlled climate adjustments.
💡 Tip: Scheduling temperature settings reduces energy use and maximizes efficiency.
🔹 Conclusion: Enjoy Your DIY MRCOOL Mini Split!
Installing a MRCOOL Mini Split System is a rewarding DIY project that saves money while enhancing home comfort and efficiency. By following this step-by-step guide, you can successfully install your system with minimal hassle.
✅ No HVAC technician required—pre-charged lines make installation simple.
✅ Ductless design = no energy loss, lower bills, and better air quality.
✅ Smart home integration for effortless climate control.
✅ Quiet, powerful, and cost-effective heating & cooling solution.
🔥 Ready to install your MRCOOL Mini Split? Shop now at www.mrcooldiydirect.com for the best prices and fast shipping! 🔥