**Introduction**
Installing a MRCOOL 18k BTU DIY Mini-Split, or any size MRCOOL Mini Split air conditioning system is a rewarding project that can significantly improve your home's comfort and energy efficiency. This guide provides a comprehensive step-by-step process to help you install your system with confidence.
- Pre-Installation Planning
-
Assessing Your Space: Measure the area you want to cool to ensure the 18k BTU unit is adequate. Consider room size, ceiling height, and sunlight exposure.

-
Tools and Materials Needed:
Gather necessary tools such as a drill, level, screwdrivers, and materials including the mounting bracket, screws, and insulation.
Always turn off the power at the circuit breaker before starting your installation to prevent electrical hazards.
Unboxing Your MRCOOL DIY System
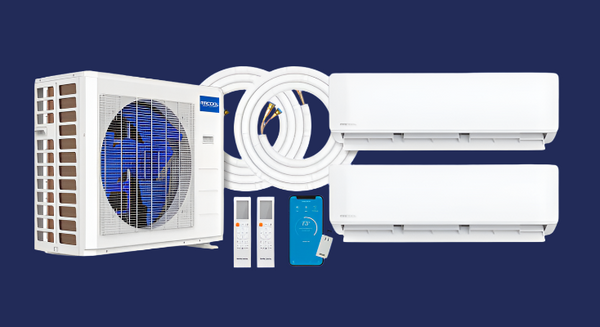
Open your MRCOOL DIY package and verify all parts are present and undamaged. Familiarize yourself with each component's function as outlined in the user manual.
Installation Preparation
-
Choosing the Right Location: For the indoor unit, select a wall that is away from direct sunlight and obstacles. The outdoor unit should be placed on a flat, stable surface with adequate ventilation.
Follow the manual to mark the wall for mounting, drill holes, and secure the mounting bracket. Ensure the bracket is level for optimal operation.
Installing the Outdoor Unit
Choose a location that supports the unit's weight and allows for proper airflow. Use a wall mounting bracket or a concrete pad as needed.
Connecting the Indoor and Outdoor Units
Carefully run the conduit, which houses the power cable, refrigerant lines, and drainage hose, between the indoor and outdoor units. Ensure connections are secure and leak-free.
Connect the indoor and outdoor units to the power supply according to the wiring diagram in the manual. Double-check all connections for safety.
NOT Needed! ( This is the best part)
This is a significant advantage and cost-saving feature of using MRCOOL's innovative DIY Mini-Split System. Traditionally, installing or maintaining air conditioning systems requires professional vacuuming of the refrigerant lines to remove air and moisture. This process necessitates specialized tools and expertise, leading to additional costs for the homeowner. However, MRCOOL's DIY Mini-Split System eliminates this step, offering a more user-friendly installation process that can be completed without professional help, thereby saving money and time for the users.
Another key advantage and cost-saving aspect of the
MRCOOL DIY Mini-Split Systems. These systems are pre-charged with the refrigerant, removing the need for professional charging during installation. Typically, the process of charging an air conditioning system with refrigerant requires technical skills and special equipment, often resulting in extra expenses for hiring a professional. The
pre-charged feature of MRCOOL's DIY systems simplifies the installation process, making it accessible to a broader range of users without incurring the additional costs associated with professional refrigerant charging, further emphasizing the cost-effectiveness and user-friendliness of MRCOOL's innovative approach to air conditioning solutions.
Finalizing the Installation
Insulate the refrigerant lines and secure the conduit with clamps. Apply sealant around the wall penetration to prevent air leakage.
- Testing Your MRCOOL Mini-Split System
Turn on the power and test the system using the remote control. Check for proper cooling and listen for any unusual noises.
Regular maintenance, such as cleaning the filters and coils, is the most affordable and effective way to ensure your HVAC system runs smoothly for years to come. Cleaning both the outside condenser coils and the indoor unit coils is essential preventive maintenance that anyone can perform. Our
MRCOOL Care Kits include everything you need to maintain energy-efficient heating and cooling, helping to extend the life of your system and keep it operating at peak performance.
- Troubleshooting Common Issues
If you encounter any issues, refer to the troubleshooting section of your manual for guidance. Common solutions often include resetting the power, checking electrical connections, and opening refrigerant valves. Remember, we're here to support you! If we can't resolve the problem, we'll make sure that MrCool technical support will get it handled for you.
- Energy Efficiency and Optimization
To maximize your system's efficiency, use the programmable features and maintain an optimal temperature setting.
Customizing Your Comfort
Learn to use the remote control and app to adjust settings and schedules for your comfort and convenience.
1. How do I choose the best location for my units?
2. Can I install the system myself?
3. How often should I perform maintenance?
4. What should I do if my system isn't cooling properly?
5. Can I extend the refrigerant lines if needed?
One of the standout benefits of purchasing your MRCOOL DIY System from MRCOOLDIYDirect is the exceptional professional customer service available to each and every customer. Our dedicated team is here to support you at every step of the process, answering all your questions before, during, and after installation. This commitment to comprehensive customer care ensures a seamless experience, making the process of installing and maintaining your MRCOOL DIY System as straightforward and stress-free as possible.
In summary, with the right preparation and attention to detail, installing a MRCOOL DIY Mini Split air conditioning system can be a straightforward and rewarding DIY project. Enjoy the comfort and savings that your new MRCOOL DIY Mini-Split system brings, all backed by the support of
MRCOOL DIY Direct!


