
Stay Cool On the Road: Installing a 120V MRCOOL DIY Mini-Split in Your Racing Trailer or Living Quarters Trailer
If you're looking for an easy, efficient, and reliable way to cool your racing trailer or any trailer with living quarters, installing a 120V MRCOOL DIY Mini-Split is the perfect solution. Unlike bulky, inefficient rooftop air conditioners, this system provides superior cooling, energy efficiency, and quiet operation—all while being easy to install without professional help.
Let’s dive into why a MRCOOL DIY Mini-Split is the ultimate upgrade for your trailer.

🔥 Why Choose a MRCOOL DIY Mini-Split for Your Trailer?
1️⃣ Easy Installation – Truly DIY!
One of the biggest advantages of the MRCOOL DIY Mini-Split is that it is specifically designed for easy installation. Unlike traditional AC units that require professional HVAC installation, the MRCOOL system allows you to do it yourself with basic tools and minimal electrical knowledge.
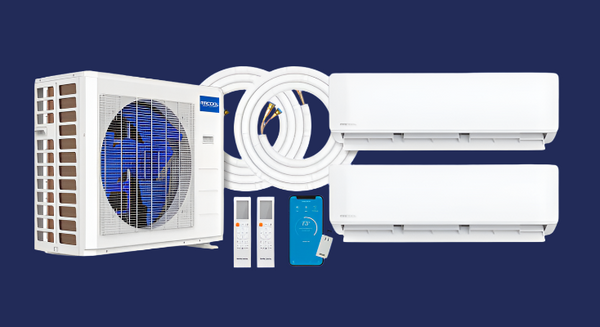
✔️ Pre-charged line sets – No need to handle refrigerant!
✔️ Quick Connect fittings – No vacuum pump required!
✔️ Simple mounting & wiring – Step-by-step guide included.
💡 Time Required: Most DIYers complete the installation in just a few hours.

2️⃣ Perfect for Mobile & Small Spaces
Racing trailers, horse trailers, toy haulers, and RVs with living quarters need compact, efficient climate control solutions. The MRCOOL DIY Mini-Split is:
✔️ Compact and lightweight – Perfect for tight spaces.
✔️ Wall-mounted indoor unit – Saves floor space.
✔️ Outdoor condenser can be mounted on the tongue or roof rack – Flexible installation options.
Whether you park at the track, campgrounds, or off-grid locations, a MRCOOL DIY Mini-Split provides consistent and powerful cooling.

3️⃣ Energy-Efficient & Cost-Effective
If you’re tired of your trailer’s roof-mounted AC draining power, the MRCOOL DIY Mini-Split is a game-changer.
✔️ Uses up to 40% less energy than rooftop ACs
✔️ Inverter technology reduces power consumption
✔️ Runs on standard 120V power – No expensive electrical upgrades needed
💰 Bottom Line: More cooling, less energy use, and lower power bills.
4️⃣ Generator-Friendly – Runs Smoothly Off Portable Power
If your trailer operates off a generator when you're off-grid, the MRCOOL DIY Mini-Split is the perfect choice.
✔️ Designed for "clean" electricity – Works with inverter generators.
✔️ No huge startup surge – Unlike traditional AC units that require a lot of power to start, the inverter-driven MRCOOL unit gradually ramps up power use, making it much easier on your generator.
✔️ Compatible with 2000W–3000W inverter generators – No need for oversized power sources.
💡 Pro Tip: If using a generator, make sure it's a pure sine wave inverter generator to ensure consistent, stable power for the MRCOOL system.
5️⃣ Whisper-Quiet Operation
One of the biggest complaints about rooftop AC units in trailers is the excessive noise.
Unlike loud rooftop units, MRCOOL Mini-Splits operate at whisper-quiet levels:
✔️ Outdoor unit is quieter than a rooftop AC compressor
✔️ Indoor unit is nearly silent – ideal for sleeping areas
✔️ No more disruptive loud cycling on & off
For race teams or anyone using a trailer as a mobile workspace or bedroom, the MRCOOL DIY Mini-Split ensures a peaceful, cool environment.
🚀 How to Install a MRCOOL DIY Mini-Split in Your Trailer
Installing a MRCOOL DIY Mini-Split in a racing trailer or mobile living space is easier than you think.
Tools Needed:
✔️ Drill & bits
✔️ Screwdrivers & wrenches
✔️ Level
✔️ Hole saw (for refrigerant line pass-through)
Step-by-Step Installation Guide
✅ Step 1: Choose the Installation Location
- Mount the indoor air handler high on the trailer’s interior wall for best airflow.
- Install the outdoor condenser on the trailer tongue, rack, or sidewall bracket.
✅ Step 2: Mount the Indoor Unit
- Secure the mounting bracket to the wall.
- Drill a small hole (2-3 inches) for the pre-charged refrigerant line, electrical wiring, and drain line.
- Hang the air handler on the bracket.
✅ Step 3: Install the Outdoor Condenser
- Place the condenser unit securely on a metal bracket, trailer tongue, or roof rack.
- Make sure it has proper airflow clearance.
✅ Step 4: Connect the Pre-Charged Line Set
- Feed the pre-charged refrigerant lines through the drilled hole and connect them to the outdoor unit.
- Hand-tighten, then use wrenches to secure. No vacuum pump needed!
✅ Step 5: Connect the Electrical Wiring
- The MRCOOL system runs on 120V power.
- Plug it into a generator, shore power, or trailer inverter system.
✅ Step 6: Power Up & Enjoy!
- Turn on the system, set the temperature, and enjoy powerful cooling anywhere you go!
⏳ Installation Time: 3–5 hours for most DIYers.
🔥 Why Upgrade to a MRCOOL Mini-Split Instead of a Rooftop AC?
| Feature | MRCOOL DIY Mini-Split | Rooftop AC |
|---|---|---|
| Installation | DIY-friendly | Requires professional install |
| Energy Efficiency | High-efficiency inverter | Energy-hungry |
| Generator Compatibility | Runs on small inverter generators | Needs large generator |
| Noise Level | Ultra-quiet operation | Loud, constant cycling |
| Cooling Performance | Powerful & consistent | Struggles in extreme heat |
| Overall Cost Savings | Saves energy, fewer repairs | Higher electricity costs |
💡 Final Verdict: The MRCOOL DIY Mini-Split outperforms traditional rooftop AC units in nearly every category.
💨 Get Your MRCOOL DIY Mini-Split Today!
If you’re serious about keeping your racing trailer, toy hauler, or RV living space cool, a MRCOOL DIY Mini-Split is the best investment you can make.
✔️ DIY installation – No HVAC tech needed!
✔️ Lower energy consumption & runs off a generator!
✔️ Quieter & more efficient than a rooftop AC!