
How to Install a MRCOOL 5th Gen Single-Zone DIY® Mini-Split (Step-by-Step)
Install your MRCOOL 5th Gen Single-Zone DIY® Mini-Split without special tools. Thanks to pre-charged Quick Connect® lines and DIYPRO® Armored Cable, you can complete a professional-quality install in hours and enjoy efficient comfort year-round.
Shop 5th Gen Single-Zone Systems Size Your Room (BTU Calculator) Watch Install Video
Why Choose a Single-Zone DIY® Mini-Split?
- Targeted comfort: Perfect for garages, bedrooms, offices, bonus rooms, and workshops.
- Lower cost: Heat or cool only the space you use.
- Fast DIY install: Pre-charged R-454B lines and quick-connects—no vacuum pump required.
- Smart control: App control, scheduling, and voice assistant compatibility.
Pre-Installation Planning
1) Size the Room
Choose capacity based on room size, insulation, ceiling height, and sun exposure.
| Capacity | Typical Space |
|---|---|
| 9,000 BTU | Up to ~350 sq ft (small bedroom/office) |
| 12,000 BTU | ~350–500 sq ft (medium room) |
| 18,000 BTU | ~500–750 sq ft (large room) |
| 24,000 BTU |
Up to ~1,000 sq ft or open areas |
| 36,000 BTU |
Up to ~1,500 sq ft or open areas |
Use the BTU Calculator to confirm sizing.
2) Tools & Materials
- Drill & bits
- Level & tape measure
- Screwdrivers/socket set
- Stud finder
- 3" hole saw & wall sleeve
- Sealant & clamps
- Mounting hardware (included)
3) Safety
Turn power off at the breaker before starting. Wear gloves/eye protection when drilling and handling copper lines.
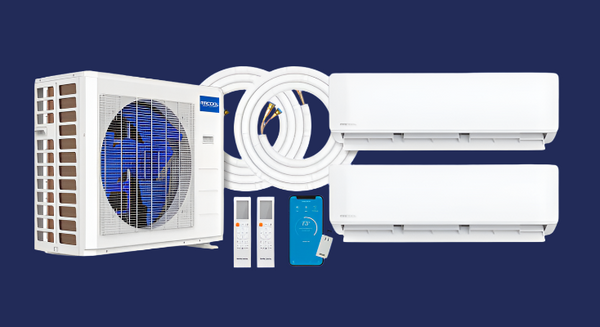
Unboxing Checklist
- Indoor air handler + mounting plate
- Outdoor condenser
- Pre-charged Quick Connect® line set (R-454B)
- DIYPRO® Armored Cable / communication cable
- Drain hose & hardware kit
- Remote, batteries, user manual
Choose the Best Locations
Indoor Unit
- Interior wall; keep 6"+ from ceiling and clear of obstructions.
- Avoid direct sun, heat sources, or nearby doors.
Outdoor Condenser
- Level pad or wall bracket with 12–24" clearance for airflow.
- Keep away from drifting snow/leaves; not in enclosed patios/crawl spaces.
Installation: Step-by-Step
Step 1 — Mount the Indoor Unit
- Anchor the mounting plate to studs; verify level.
- Drill a ~3" hole with slight downward pitch to outside; insert wall sleeve.
- Feed line set, cable, and drain through the sleeve.
Step 2 — Set the Outdoor Condenser
- Place on pad or bracket; ensure it’s secure and level.
- Clear debris; maintain required service clearances.
Step 3 — Connect the Units
Attach the Quick Connect® fittings from the indoor to the outdoor unit. Hand-tighten, then torque to spec. The sealed, pre-charged R-454B lines eliminate the need for vacuum pumps or gauges.
Step 4 — Electrical
Wire according to the diagram using the color-coded terminals on the DIYPRO® Armored Cable. Confirm breaker size and local code compliance.
Step 5 — Weatherproof & Finish
- Insulate the refrigerant lines and secure the conduit.
- Seal the wall sleeve to stop drafts and moisture.
- Open service valves per manual (if applicable).
Power-Up & Test
- Restore power at the breaker.
- Use the remote or the MRCOOL Smart HVAC App to set mode and temperature.
- Confirm steady airflow and proper cooling/heating; check for unusual noise or leaks.
Watch the step-by-step install video for visual guidance.
Maintenance Tips (Keep It Efficient)
- Filters: Clean every 30–60 days.
- Indoor coil & outdoor fins: Clean 2x per year.
- Use the MRCOOL Care Kit for mess-free coil cleaning and filter replacement.
Troubleshooting
| Issue | Likely Cause | Quick Fix |
|---|---|---|
| Not cooling/heating | Wrong mode/setpoint | Set correct mode; lower/raise target temp |
| Water indoors | Kinked or clogged drain | Straighten/flush drain line |
| No power | Tripped breaker/loose wire | Reset breaker; verify connections |
| Error code | Minor alert | See manual; contact support if persists |
Need help? We’re here for you. If we can’t resolve it, we’ll coordinate with MRCOOL Technical Support to make it right.
Energy Efficiency & Comfort Optimization
- Use Eco or Sleep mode overnight.
- Create daily schedules in the app.
- Enable Follow Me® on the remote for temperature where you are.
Single-Zone DIY® FAQs
Can I install a MRCOOL DIY® system myself?
How often should I clean the filters?
Can I extend the line set?
Does it qualify for rebates or tax credits?
Ready to Start Your DIY Install?
Shop MRCOOL 5th Gen Single-Zone DIY® Systems
BTU Calculator • Install Video Guide • Compare Multi-Zone (5th Gen)